AngularJS Grails Template - Part 1: Getting Started
The goal of the Angular Grails Lazybones Project was to create a simple starting point for people who wanted to use AngularJS and Grails together. This allows you to setup an Grails project and generate AngularJS CRUD applications from your domain classes.
Creating a New Project
First we need to make sure we have lazybones installed. The easiest way to do this is through GVM like so:
gvm install lazybonesThen we can easily create our new web app:
lazybones create angular-grails example-appAfter running this command you’ll be asked a series of questions about your project. Here’s what the questions look like, with responses I’ve entered for an example application:
1
2
3
4
5
6
Define the name for your project [angular-grails]: example-app
Defined the version of AngularJS you want in your project [1.3]: 1.3
Define value for your main AngularJS module [myApp]: exampleApp
Define the value for your application group [com.company]: com.craigburke
Define value for your application 'version' [0.1]: 1.0
Define the name for your war file [ROOT.war]: my-app.war
When selecting the AngularJS version (question 2), you can opt for either AngularJS 1.2 or 1.3. If you need to support an older version of Internet Explorer(IE) such as IE 8 or below, you should choose AngularJS 1.2. The 1.3 version does not support IE 8 and below.
After answering these questions you should then have a new Grails project in the folder you specified (example-app in this case) with some goodies like Bootstrap, Angular UI and Font Awesome already included. As we’ll see later, there’s also a lazybones subtemplate (located in the .lazybones folder) that will help you create new Angular modules.
One other way that this project is different from a standard Grails project is that it makes use of Grails Gradle plugin.
By using the Gradle Grails plugin here we can run JavaScript and Groovy tests with a single command and also not have to worry about installing all the testing dependencies that are needed (Karma, Jasmine, PhantomJS, etc).
Adding a Domain Class
Once we’ve created our project, the next step is to add a domain class in the usual grails-app/domain location. Here’s an Employee domain class I’ll use for this example:
grails-app/domain/com/craigburke/Employee.groovy
package com.craigburke

class Employee {
	String firstName
	String lastName
	Date birthDate
	BigDecimal salary

	static constraints = {
		birthDate(required: true)
	}
}
Generating a CRUD AngularJS Module
Now that we have the domain class to use as our base, we can generate an AngularJS CRUD module to get us started by running the following with the project folder:
lazybones generate module We’ll then be prompted to answer some questions about our new module:
Define the name for your new module [myModule]: employee
Define the name of the domain class [Foo]: Employee
Your Angular app (exampleApp.employee) has been created
URL: /employee
Now we can run our app to take a look at our new module
gradlew runIf we browse to http://localhost:8080/example-app/employee we should see something like this:
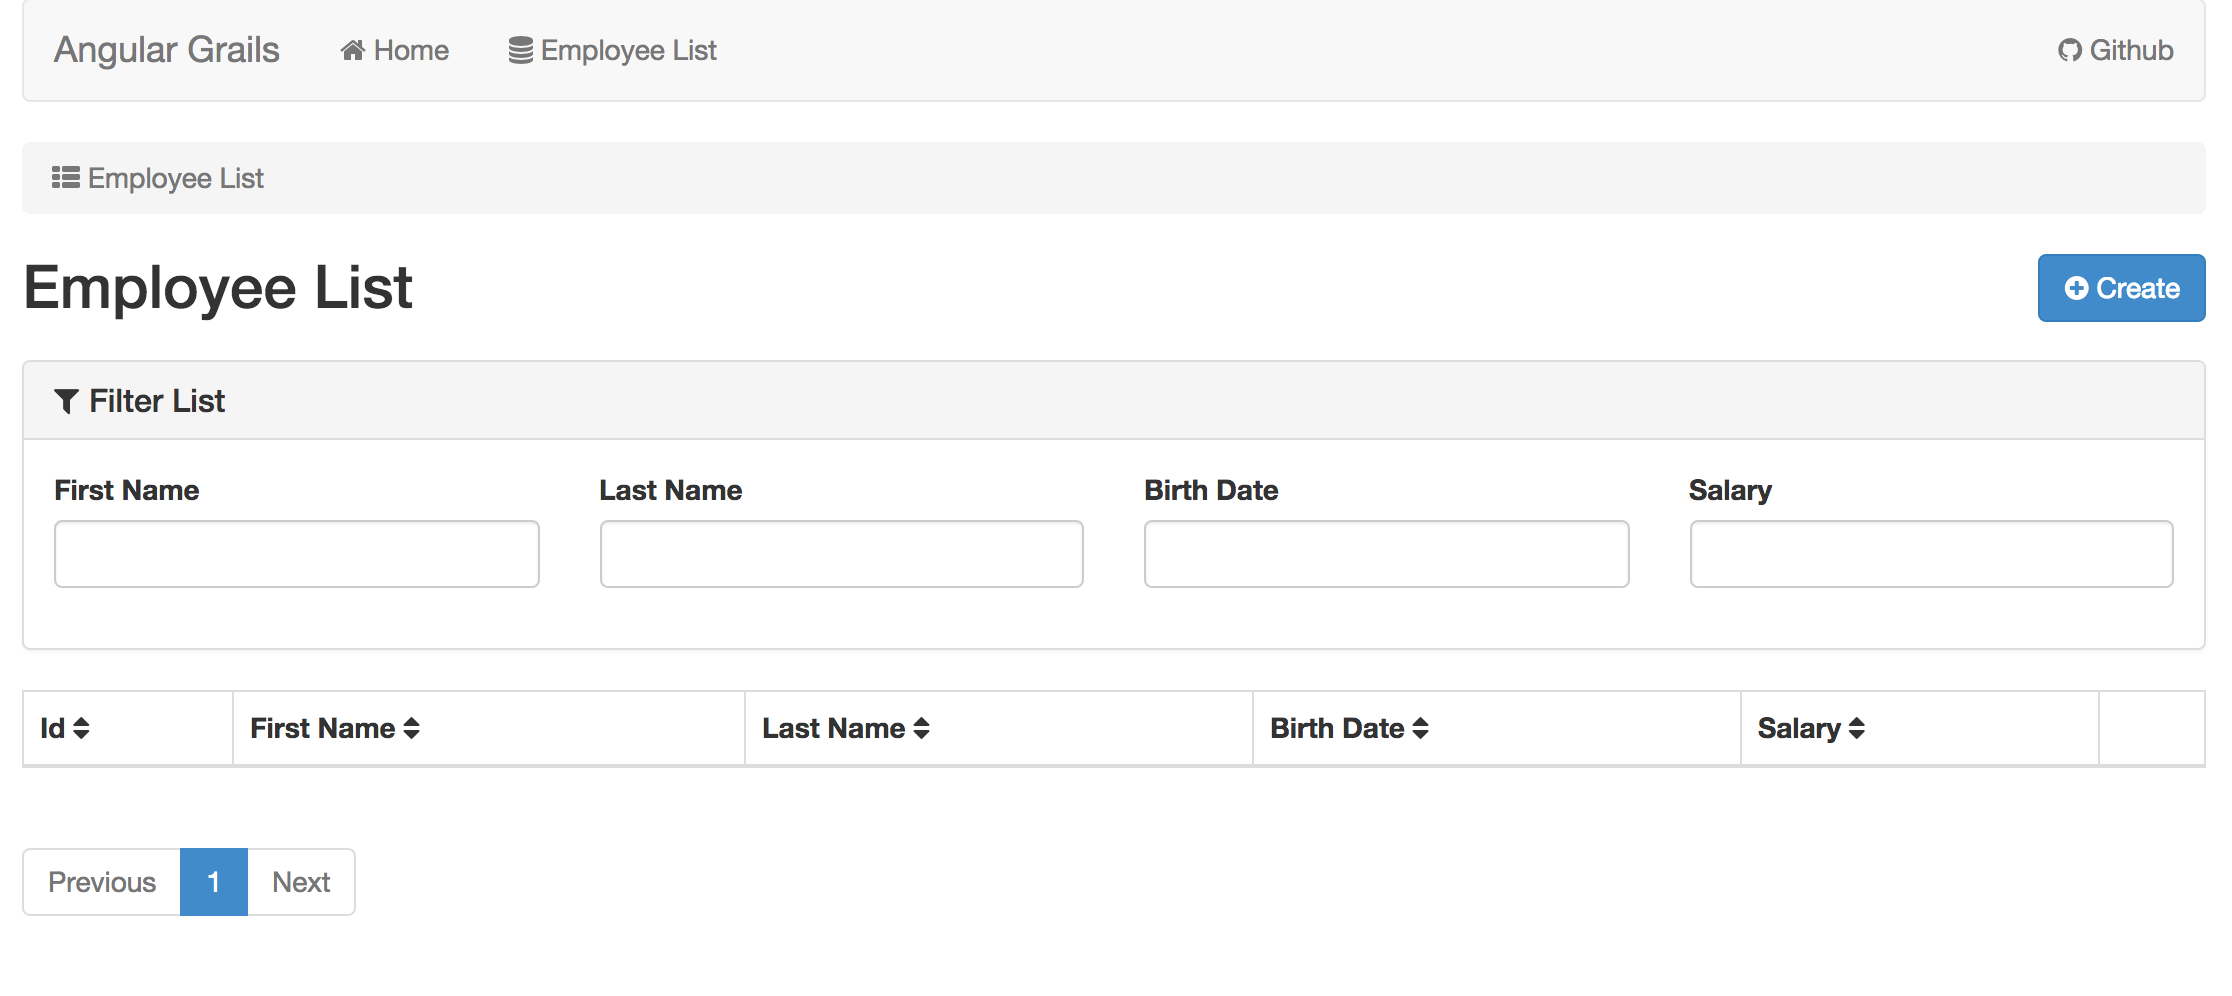
We’ve got a paged list of employees that we can add to (as well as edit and delete), we can also filter the list on based on the four properties found in the domain class. Awesome!
Project stucture
Next we’ll take a look at exactly what the lazybones generate command actually added to our project. First lets take a look at the relevant parts of our grails-app/conf/UrlMappings.groovy file:
class UrlMappings {

	static mappings = {
        '/employee'(view: 'employee')
		'/api/employee'(resources: 'employee')
		// ...
	}
}
Here we see that two mappings have been created one for the REST actions /api/employee and one that links to a new view that was created.
Now we’ll look at the EmployeeController that was generated which handles all those REST requests:
grails-app/controllers/com/craigburke/EmployeeController.groovy
package com.craigburke
import com.craigburke.Employee

class EmployeeController extends PagedRestfulController {
    EmployeeController() {
        super(Employee)
    }
}
The PagedRestfulController is very similar to the default RestfulController that’s part of Grails with some additional support for filtering and paging.
Here’s what the employee.gsp view looks like:
grails-app/views/employee.gsp
<!DOCTYPE html>
<html>
<head>
<meta name="layout" content="main"/>
<asset:javascript src="example-app/employee/module"/>
</head>
<body ng-app="exampleApp.employee">
</body>
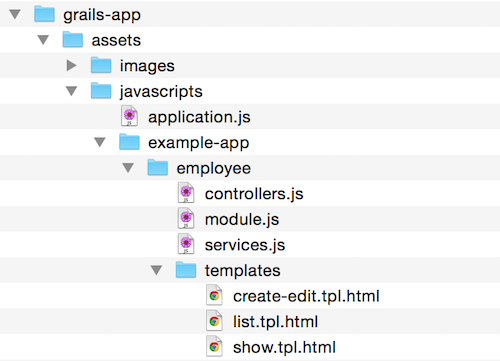
</html>This view is very simple because it’s just the entry point of our AngularJS app. All the relevant JavaScript and angular templates are found in /grails-app/assets/javascripts/example-app/employee. Here’s what the structure of our new AngularJS module looks like:
Tests
The lazybones generate command also added some tests for our new module. There are Geb/Spock functional tests as well as AngularJS Jasmine unit tests as seen below:

This tests may fail depending on your specific constraints, but should serve as a good starting point. To run all the tests you use this command:
gradlew testIf you want to run only the Jasmine unit tests you can run this command:
gradlew jasmineRunAlternatively you can run your Jasmine tests in watch mode so they are run everytime your source changes:
gradlew jasmineWatchThese Gradle tasks are setup so that all the dependencies are downloaded and resolved for you. The only thing you need to have install is the JDK.
Paging and Filtering
The default filtering works well for simple cases but you’ll likely want to override this method to have a bit more control over what is filtered.
For example if I wanted to add just a simple box that searches both first name and last name I would override the loadPagedResults method in my EmployeeController like so:
grails-app/controllers/com/craigburke/EmployeeController.groovy
package com.craigburke
import grails.gorm.PagedResultList
import com.craigburke.Employee

class EmployeeController extends PagedRestfulController {
    EmployeeController() {
        super(Employee)
    }

    @Override
      protected PagedResultList loadPagedResults(params) {
          def filter = params.filter

          resource.createCriteria().list(max: params.max, offset: params.offset) {
              if (filter?.search) {
				  or {
                  	ilike('firstName', "${filter.search}%")
                  	ilike('lastName', "${filter.search}%")
				  }
              }
              if (params.sort) {
                  order(params.sort)
              }
          }
      }

}
The relevant part of the HTML in my /grails-app/assets/javascripts/example-app/employee/templates/list.tpl.html file would then be simplified to this:
<div class="panel panel-default">
  <div class="panel-heading">
    <h3 class="panel-title"><i class="fa fa-filter"></i> Filter List</h3>
  </div>
  <div class="panel-body">
	  <div class="row">
		  <form class="form">
			  <div class="form-group col-md-2">
				  <label for="filter.search">Name Search</label>
				  <input type="text" class='form-control' ng-model="ctrl.filter.search" ng-model-options="{ debounce: 300 }"  />
    		  </div>
		  </form>
	  </div>
 </div>
 </div>
JSON Response
When you generate a new CRUD module, a custom JSON marshaller is created for your domain class and added to to the CustomMarshallerRegistrar class.
Here’s an example of what the default marshaller for the Employee class would look like:
src/groovy/com/craigburke/CustomMarshallerRegistrar.groovy
package com.craigburke

import grails.converters.JSON

class CustomMarshallerRegistrar {

	void registerMarshallers() {
		JSON.registerObjectMarshaller(com.craigburke.Employee) {
			def map = [:]
			map['id'] = it?.id
			map['firstName'] = it?.firstName
			map['lastName'] = it?.lastName
			map['birthDate'] = it?.birthDate
			map['salary'] = it?.salary
			map['toText'] = it?.toString()
			return map
		}
	}

}
By default it includes all the fields from the Employee domain class in addition to a toText property that is set to the value of the toString method.
If, for example, you wanted to remove salary property from the default JSON response, just remove that line from here. This will mean though, that you’ll need to modify your Angular Templates to remove the references to salary as well. In this case, the templates would be located within the grails-app/assets/javascripts/example-app/employee/templates folder.
Conclusion
As you can see, this template allows you to quickly get started building an AngularJS application in Grails.
The template was designed to be highly customizable and there are lots of ways to customize and modify your app and the modules you can generate. I go into more detail on the more advanced customization in Part 2: Advanced Customization.